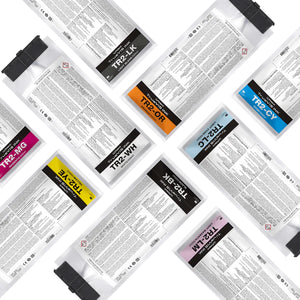
Printing a white layer in direct to film printing is crucial for achieving accurate and vibrant results in the final product. This white layer serves as an under base, providing a solid and opaque foundation on which subsequent colors can be printed. Without this layer, the inherent color of the substrate may influence the appearance of the printed inks, leading to a lack of vibrancy and color accuracy. Additionally, the white layer enhances the visibility of lighter ink colors on dark or colored substrates, ensuring that the final print maintains its intended design and color fidelity.
Creating a white layer in RasterLink manually can be daunting. Here is a way to create a preset so there is no need to repeat unneeded steps!
- Load any vector file into RasterLink 7
- Select the Quality Tab
- Change the Media Preset to "Generic DTF Film sp" [1]
-
Change the Color Matching to the shown custom settings. [2]
- Highlight the drop down box and type "Mimaki_Expand_Color_Replica". Hit the green plus to be able to make the necessary edits
- Illustration > Relative
- Image > Relative
- RGB > AdobeRGB1998.icc
- CMYK>MimakiHiContrast.icm
- Select the Printer Management Tab
- Select the Mirror option
- Select on the Special Plate Tab
- Choose the percentage of white you want the printer to print
- The different percentages are dependent on what you are transferring on
- 100%-80% White Ink > Black or Dark Fabrics
- 50%-25% White Ink > White or Light Fabrics
- For this demo, we want 100 percent white
- Choose the Created Area you prefer (We Recommend Choosing Valid to non background)
- Whole Image > Prints a white backing around everything
- Valid Pixel > Prints a white backing on everything that has color
-
DOES NOT see white (0% CMYK) as a color
- Valid to non background > Prints a white backing on everything that has color including white
-
DOES see white (0% CMYK) as a color
- Then select Create when finished

- Select the Layer Tab
- Under Special Color select Correct the size > Thinning > make the Scan and Feed 2 or 3 pixels
- This ensures there will be no white peaking out from your print
- With the Color layer highlighted, select the Favorites tab (Yellow Star)
- Type in the name you'd like to call this layer
- Select the Green Plus sign to add it to your presets
- Select the Quality tab on the right
- Select the Update Favorite button up top
- You should see the settings on the left (Favorite) match the settings on the right (Job Setup) when the Update Favorite button is selected
- Select the Printer Management tab on the right
- Select the Update Favorite Button
- You are looking for the Mirror option to turn ON
- Hit Close or exit out the window
- select the White Layer in your print queue, then select the Favorites tab again
- Select the Preset name you are creating [1]
- Select the Special Plates tab on the right [2]
- Select Update Favorite Button [3]
- Change the Settings as shown in the Execute drop boxes [4]
- Select the Layer tab on the right
- Select the Update Favorite Button

- Hit Close or exit out of window
- Now when you load in a new file, you should have the option to select the new preset you just created in the Favorite box

For more questions, give us a call or shoot us an email!
(518)583-2818 | techsupport@grantgraphics.com


